


Adding Texture Techniques Photo Shop

Bitmaps dont's always have to look flat. Introducing “Grotto”, a character made almost entirely of bitmap fills and some carefully placed Flash gradients to provide the illusion of form, volume and, most
of all, texture. Here we’ll look at how to give otherwise flat bitmap textures a bit more depth using some basic
gradients and alpha.
Rule:

 1. The first step is to create your texture in Adobe Photoshop, import it into Flash, break it apart and then select it with the Eyedropper tooli. I created the shape for Grotto’s body with the paint brush and the bitmap swatch as my fill “color”. Select the body shape and convert it to a graphic symbol.
2. Edit the symbol by adding another layer above the shape layer. Copy C ctrl C and paste in place CSv
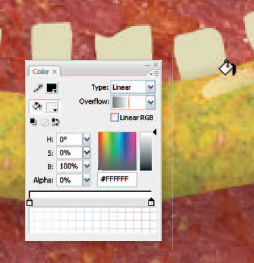
LSvthe body shape into this new layer. Fill it with a radial gradient with two colors; black with about 30% alpha and black with 0% alpha.
3. The mouth/lip symbol was made the same way by layering a radial gradient over the bitmap fill shape. Use
the Fill Transform tool to position the gradient so it forms a shadow along the bottom half of the shape.

fill. Here I used a linear gradient for the inner nostril shape and a radial gradient to provide some shading for a more realistic effect.

6. When all these subtle details are combined, they can add up to a very sophisticated image. The shapes that
make up Grotto are simple yet convincing simply by layering some basic gradients over our textures.

You may also want to adjust the properties of the imported bitmap (doubleclick the bitmap icon in the document library) and select “Apply Smoothing”. This will apply anti-aliasing to your image and make it appear smoother.
0 comments:
Post a Comment